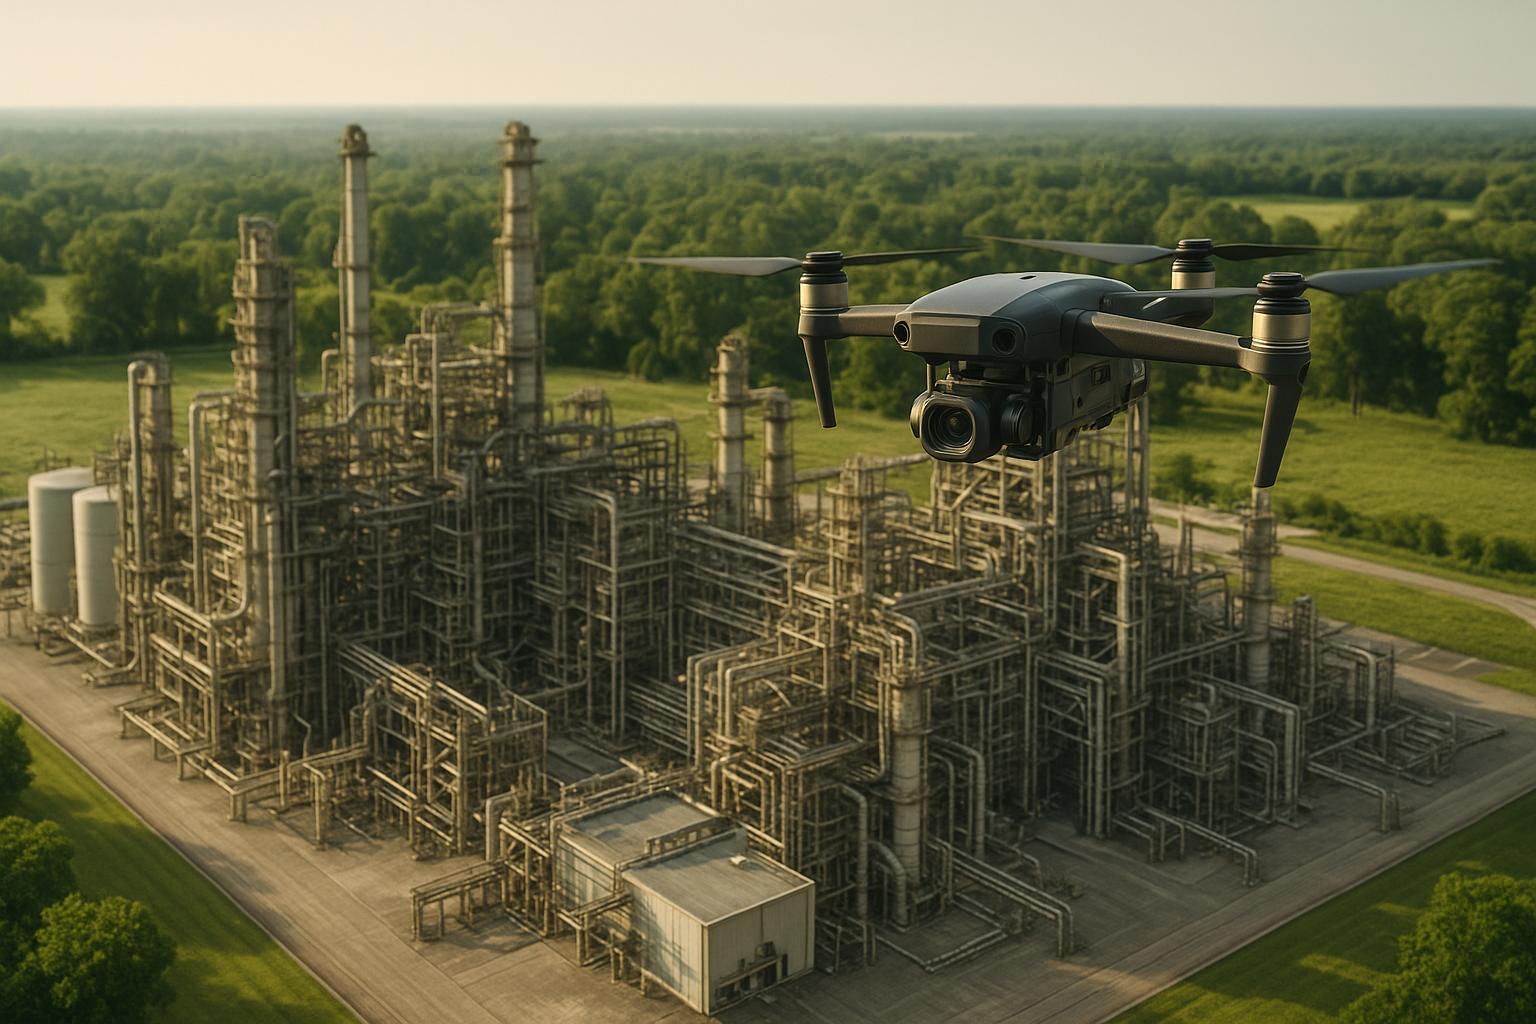
Drones are transforming asset inspections by making them safer, faster, and more precise. Traditional methods often require scaffolding, downtime, and risky manual labor. Drones eliminate these challenges, cutting inspection time by 75% and detecting 30% more defects. They not only capture high-resolution images but also create detailed 3D models that allow for accurate measurements, remote diagnostics, and predictive maintenance.
Key benefits include:
- Cost savings: No need for scaffolding or shutdowns.
- Efficiency: Faster data collection and fewer site visits.
- Safety: Reduces risks to workers by inspecting hard-to-reach areas.
- Precision: 3D models reveal small defects and track damage over time.
How to 3D model & measure a building using drones? | Hammer Missions
Step 1: Planning Your Drone Inspection
Getting a drone in the air is just one part of the equation. The real success of a drone inspection begins well before takeoff, with careful planning. This preparation phase determines whether you'll gather valuable data or end up with gaps that waste time and resources. From assessing the site to choosing the right equipment, every detail counts.
Site Assessment and Flight Planning
Before you even think about launching your drone, start with a virtual review of the site. Tools like Street View, Nearmap, and Google Maps can give you a sense of the location, surroundings, and potential obstacles without needing an initial visit. This step helps you anticipate challenges and streamline your approach.
Next, check the airspace around your inspection site to ensure you can legally and safely operate there. Airspace classifications come with specific restrictions, and understanding them early can save you from delays. Watch out for obstructions like trees, buildings, or roads, and for vertical structures like towers, factor in wind patterns and any restricted zones nearby.
Your flight plan should cover everything: takeoff and landing spots, flight patterns, estimated duration, the number of images needed, and total operation time. For assets like building facades or pipelines, consider grid or spiral flight patterns to ensure consistent altitude and image overlap. For complex structures, multiple passes at different angles may be necessary to capture every surface.
Weather is another critical factor. Wind speeds above 25-30 mph can compromise drone stability and image quality, making it harder to create accurate 3D models. Rain, snow, or extreme temperatures can also affect battery life and sensor performance. Check weather forecasts several days in advance and again 24 hours before your inspection. Always have backup dates in case conditions aren't favorable.
For inspections requiring precise results, set up ground control points (GCPs) before flying. These are high-contrast markers placed at known GPS coordinates to improve model accuracy. Use a high-accuracy GPS receiver to record the coordinates, aiming for 2-5 centimeter precision for industrial applications. Depending on the asset size, you may need 4-8 GCPs strategically placed around the area. These points allow for sub-millimeter precision in your final 3D models.
Once your flight plan is ready, it’s time to select equipment that matches your inspection needs.
Choosing Equipment and Setup
The equipment you choose can make or break the quality of your inspection. The right drone and sensors ensure you capture the level of detail required for accurate 3D models.
For general visual inspections, look for drones with high-resolution cameras and a wide field of view (FOV). These features reduce the number of passes needed, saving time and lowering operational costs. If your goal is 3D modeling, prioritize drones with fast image capture capabilities - ideally, a 0.5-second shooting interval. Drones with 5-directional oblique capture and in-camera distortion correction are particularly useful for detailed modeling tasks.
Specialized sensors, like thermal imaging cameras, LiDAR systems, or methane detectors, may be necessary for specific projects. For example, thermal cameras can spot heat anomalies in electrical systems, while LiDAR provides precise structural measurements. If you're inspecting hard-to-reach areas like offshore platforms or high-rise buildings, consider drones with extended flight times and advanced stabilization features.
Before heading out, create an equipment checklist. Include essentials like the drone, spare batteries (2-3 sets for longer operations), camera lenses or specialized sensors, calibration targets, GPS ground control points, and data storage devices. Double-check that everything is in working order and properly calibrated. Set up a data management plan to securely store and back up your findings.
Assign clear roles to your team before arriving on-site. Designate a lead pilot, backup pilot, visual observer, and data manager. Brief everyone on the asset, expected flight duration, and contingency plans. Arrive early - typically 1-2 hours before start time - to assess the site, set up equipment, and ensure everyone is prepared.
Safety and Regulatory Requirements
Safety and compliance are non-negotiable when it comes to drone inspections. In the United States, commercial drone operations fall under the Federal Aviation Administration (FAA) Part 107 rules. Securing the necessary regulatory approvals should be part of your planning process.
The operator must hold a Remote Pilot Certificate (Part 107 certification), which involves passing an FAA knowledge test. If your operation requires flying beyond the visual line of sight (BVLOS), you'll need to apply for a waiver or authorization. Depending on the airspace and location, you might also need to file a Notice to Airmen (NOTAM) or obtain specific airspace permissions.
Plan ahead - regulatory approvals can take 2-4 weeks. Document these requirements in your pre-flight checklist to avoid any last-minute issues.
Before flight, verify that your drone systems are functioning correctly, batteries are fully charged, and sensors are calibrated. Conduct a final check of the site to confirm conditions are safe and no new obstacles have appeared. Establish a safety perimeter around the launch and landing zones to keep unauthorized personnel at a safe distance.
During the flight, monitor weather conditions, battery levels, and signal strength. Always maintain visual contact with the drone or use a qualified visual observer. Bring safety gear like first aid kits, high-visibility vests, and communication devices to the site.
After landing, review the collected data to ensure image quality and sufficient overlap for 3D modeling. Note any issues or near-misses to refine your safety and operational procedures. This post-flight review helps confirm you've gathered all necessary data, avoiding the need for costly return trips.
Step 2: Collecting Data with Drones
Now that your planning is done and your equipment is ready, it’s time to gather the data that will shape your 3D model. This step requires precision because the quality of your flight directly impacts the accuracy of your final model. Even small mistakes can result in gaps or distortions, leading to higher costs down the line.
Flying the Drone for Best Results
The way you operate your drone plays a critical role in creating accurate 3D models. For photogrammetry to work effectively, you need 60–80% image overlap to establish accurate spatial relationships between images. Without enough overlap, the software used to stitch images together won’t work properly, leaving you with incomplete or flawed models.
Consistency is key. Fly at a steady altitude and speed to ensure uniform image quality and scale. Automated flight paths are particularly helpful for maintaining even spacing, altitude, and coverage, which speeds up the process and ensures consistent data collection. However, manual flights are better for capturing close-up details, especially when inspecting defects. A hybrid approach - combining automated and manual flights - can help you gather both broad and detailed imagery.
Different types of structures call for different flight patterns. For example:
- Towers: Fly in circles at various altitudes.
- Building facades: Fly parallel to the surface, maintaining a consistent distance.
- Linear structures (e.g., pipelines, power lines): Follow the structure’s length while keeping a steady altitude.
During the flight, monitor real-time data like focus, exposure, and coverage to spot any gaps before landing. If you’re flying in windy conditions or tight spaces, reduce your speed and lower your altitude to maintain sharp, detailed images. Also, aim for consistent lighting - overcast skies or steady sun angles help ensure even exposure across your images.
After landing, generate a quick preliminary 3D model to confirm you’ve captured all the necessary angles and details. This step helps you catch any missing components right away, allowing you to refly if needed. Real-time validation saves you the trouble of discovering issues later during processing, reducing the risk of rework.
Modern drones can collect a variety of data types:
- High-resolution imagery: Ideal for spotting surface issues like cracks or corrosion.
- Thermal imaging: Useful for detecting heat-related problems such as electrical faults and insulation issues.
- LiDAR scans: Create highly accurate 3D point clouds for detailed measurements and structural analysis.
- Methane sensors: Essential for inspecting oil and gas infrastructure.
Combining these data types in a single flight provides a comprehensive dataset for a more thorough analysis.
The camera specs on your drone also matter. Higher megapixel cameras capture finer details, which is crucial for detecting defects and making precise measurements. A wide field of view can reduce the number of passes needed for large structures, though it might introduce slight edge distortion. Drones equipped with 5-directional oblique capture can take both nadir (straight-down) and angled images simultaneously, improving model completeness while cutting down flight time. Using 0.5-second shooting intervals ensures sufficient overlap, even at higher speeds.
Throughout the flight, keep an eye on battery levels to ensure you can complete your planned route without interruptions. Watch out for obstacles like trees, power lines, and nearby buildings, and ensure your GPS signal remains strong. Regularly calibrate your compass to maintain accurate positioning for your 3D model.
Once you've gathered all the necessary data, the next step is to securely store and organize it for processing.
Storing and Backing Up Data
After capturing high-quality images, it’s crucial to handle your data carefully before moving on to the processing phase. Drone inspections generate a massive amount of information - high-resolution images, videos, thermal scans, and LiDAR data can quickly add up to hundreds of gigabytes per flight. Losing this data means redoing the entire inspection, wasting both time and money.
Transfer the data to a computer or external drive as soon as possible after landing. This not only frees up space on your drone for the next flight but also creates your first backup. Don’t wait until you’re back at the office - unexpected issues like data corruption or storage card failure can happen at any time.
For added security, back up your data in multiple locations. Use both local storage and cloud systems, and organize files with clear naming conventions (e.g., "BuildingA_11-29-2025_AutomatedFlight") to make retrieval easier.
Make sure to preserve metadata such as GPS coordinates, altitude, camera settings, and timestamps for each image. This information is essential for photogrammetry software to accurately reconstruct 3D models. While most drones embed this data automatically, it’s a good idea to double-check that everything is being recorded correctly.
Review a sample of your images post-flight to confirm they meet your quality standards. Check for sharp focus, balanced exposure, and adequate overlap between consecutive images. Even small issues like blurry photos or gaps in coverage can affect your final model’s quality.
Document key flight details, including the duration, number of images captured, altitude range, weather conditions, and any challenges you encountered. This information can help you refine your approach for future flights and identify areas that might need additional passes or manual inspection.
Finally, prepare a flight report summarizing what was captured, any issues faced, and recommendations for processing. This report provides valuable context for the team working on the data and serves as a reference for future projects.
Store your data in formats compatible with industry-standard photogrammetry software like Pix4Dmatic or Bentley Systems ContextCapture to ensure it remains usable over time. As you refine your 3D models or conduct further analyses, use version control to keep track of processing updates and avoid confusion about which version is current.
Once your data is safely stored and backed up, you’re ready to move on to processing, where your raw images will take shape as detailed 3D models.
sbb-itb-ac6e058
Step 3: Creating 3D Models from Drone Data
Now that your data is safely stored and organized, it's time to turn those raw images into detailed 3D models. This is where all the effort you put into planning and flying pays off. The quality of your final model hinges on a well-executed conversion process.
Processing Photogrammetry and LiDAR Data
Photogrammetry software works by stitching together overlapping images to create a 3D model. It uses computer vision algorithms to pinpoint common features across multiple photos, reconstructing the structure of the asset in three dimensions. Each image adds unique spatial information, which the software aligns to build the model.
Specialized software handles tasks like aligning images, correcting colors, and reconstructing geometry. Many tools now include features like in-camera distortion correction and advanced 3D capture modes, making it easier to model irregularly shaped objects.
Photogrammetry excels at capturing surface details, such as textures and colors, which makes it great for spotting issues like cracks or corrosion. On the other hand, LiDAR uses laser scanning to create precise point clouds that measure distances and spatial relationships. Drones equipped with five-directional oblique capture can take both straight-down (nadir) and angled images, improving model completeness and cutting down on processing time. Using 0.5-second shooting intervals during flights ensures enough image overlap, even at higher speeds, which leads to better-quality models.
AI and computer vision are now central to processing these models. AI tools can detect anomalies like cracks or misalignments with accuracy rates over 95%. These systems also allow for real-time analysis, flagging issues during or immediately after a flight. They can even take precise measurements - such as tilt, spacing, and alignment - down to sub-millimeter accuracy, reducing the chance of human error. AI models can also differentiate between various asset components, enabling detailed, component-level inspections.
Some platforms even let you create preliminary 3D models in the field to check for data completeness. This helps avoid costly return trips if gaps or missing angles are found. Once your model is built, verifying its accuracy is the next crucial step.
Checking Accuracy and Quality
To ensure your 3D model meets inspection standards, accuracy is key. For structural inspections, models should be detailed enough to detect fine cracks or corrosion. Start by comparing the model against known reference points, like measured distances between structural elements, to confirm its scale and dimensions. Advanced software often includes tools to automatically check critical dimensions, angles, and alignments.
Inspect the model at different scales to confirm consistent accuracy. Watch for issues like missing transition images, which can cause gaps or distortions, or insufficient overlap between images, which can result in incomplete reconstructions. Problems with focus or exposure can also affect model quality, sometimes requiring a return visit to capture new data. Proper geolocation is another critical factor - every data point must be accurately positioned to create a reliable and contextually accurate model.
After generating your 3D model, conduct a thorough review to ensure it aligns with your original inspection goals. If your model includes thermal imagery, check that temperature readings are accurate and properly integrated with the 3D geometry. Many organizations also document software versions and processing parameters to maintain version control, enabling reproducibility and tracking improvements over time.
Building Digital Twins
Once your 3D model is validated, you can take it a step further by creating a digital twin. While standard 3D models offer a static representation of an asset, digital twins are dynamic, interactive virtual replicas that provide real-time monitoring and support predictive maintenance. This process starts with the high-quality 3D model and enhances it with metadata, thermal imagery, LiDAR scans, and other sensor data. The result is a comprehensive digital representation that allows for sub-millimeter detail and full 360° exploration.
Integrating digital twins with asset management systems, such as CMMS or ERP platforms, adds another layer of functionality. For instance, if an AI algorithm detects a crack in a structural beam, it can automatically generate a work order in your maintenance system, complete with the exact location, severity, and visual documentation. Predictive maintenance becomes possible by analyzing historical and current data to anticipate potential failures.
"This is a differentiator. Those that aren't able to provide visualization but are just doing raw footage - this gives you, in my opinion, that competitive edge."
– Adrian, Drone Service Provider
Platforms such as Anvil Labs support a variety of data types, including 3D models, 360° photos, thermal imagery, LiDAR scans, and orthomosaics. These platforms offer centralized storage, customizable viewing options, annotation tools, and secure data sharing. This streamlined ecosystem ensures inspection data flows seamlessly into decision-making processes.
Digital twins also allow for remote diagnostics, enabling experts to assess assets from anywhere, cutting travel costs and speeding up response times. For large facilities with hundreds or thousands of assets, digital twins create a living inventory that evolves as conditions change. Each inspection updates the digital twin, building a historical record that helps track aging and deterioration over time.
The success of a digital twin depends on the accuracy and completeness of your initial 3D model. Advanced features like AI analysis, predictive maintenance, and system integration all rely on having reliable base data. The detailed planning, precise flying, and thorough validation you’ve done earlier set the stage for effective digital twin implementation and long-term asset management.
Step 4: Using and Sharing 3D Models
Take your validated 3D model and turn it into actionable insights. This step builds on the detailed models you've created, focusing on using the data to develop effective maintenance strategies.
Finding Defects and Analyzing Data
Your 3D model is more than just a visual representation - it's a diagnostic powerhouse. By examining it at various zoom levels, you can uncover hidden issues. Zoom in to sub-millimeter levels to detect cracks, corrosion, or loose bolts. With a full 360° view, you can inspect every angle of an asset, even those that would typically need scaffolding or specialized access.
AI tools take this to the next level. When drone imagery is uploaded to platforms with built-in AI, the system scans for anomalies like cracks, misalignments, or surface wear. These algorithms can pinpoint defects with impressive accuracy, often spotting what human inspectors might miss.
Precise measurements are another advantage of 3D models. You can calculate distances, estimate material volumes, and assess beam deflections - all without physically accessing the structure. This is especially useful for compliance documentation, where accuracy is non-negotiable.
By comparing models over time, you can track how damage progresses. For instance, side-by-side comparisons can reveal how corrosion spreads or whether recent repairs are holding up. This type of analysis is key for predictive maintenance, helping you intervene before minor issues become major problems.
Integration with your existing systems makes the process even smoother. Once defects are identified, the data can automatically feed into your CMMS or ERP system, creating work orders with exact locations, severity levels, and visual proof. This seamless workflow reduces response times and ensures nothing slips through the cracks, enabling better reporting and collaboration across teams.
Creating Reports and Working with Teams
Reports generated from 3D models offer a level of clarity that static photos simply can't match. Instead of wading through hundreds of images, stakeholders can explore an interactive 3D environment where defects are clearly marked, measured, and annotated. This makes it easier for engineers, maintenance teams, and decision-makers to understand the scope and location of issues.
Annotations can be added directly to the 3D model, providing notes on severity, recommended actions, and priorities. For example, you could tag a corroded beam with measurements showing material loss, attach close-up images, and include a note suggesting specific maintenance steps. These annotations stay anchored to their exact locations, ensuring everyone reviewing the model knows precisely what needs attention.
Use annotation and measurement tools to document distances, angles, and other critical metrics. This quantitative data is invaluable for engineers conducting structural assessments. If thermal imagery is integrated, you can overlay temperature readings on the model to identify hot spots or cold zones, which might indicate stress on equipment.
Reports can be customized for different audiences. Engineers might require detailed measurements and high-resolution images, while management might prefer summaries that highlight key findings, risks, and scheduling recommendations. Many organizations create both detailed and summary reports from the same data, ensuring consistency across teams.
Automated reporting simplifies the process. AI can generate annotated visuals, compile defect lists, and update dashboards as new data comes in. This reduces the time spent on manual report creation, allowing inspectors to focus on analysis.
Remote collaboration becomes seamless with centralized 3D models. Field inspectors can gather data, engineers can analyze it in the office, and maintenance planners can review findings from anywhere. This eliminates delays and cuts down on travel costs.
Hosting and Sharing with Anvil Labs
After analyzing and reporting defects, centralized data management is the next step. Hosting your 3D models in one place solves the challenge of managing large files while making them easily accessible to your team. Platforms like Anvil Labs support diverse data types, including 3D models, 360° photos, thermal imagery, LiDAR, and orthomosaics - all in one system. This eliminates the need for juggling multiple tools or storage solutions.
Customizable viewing options let users toggle between data layers. For instance, you can start with a standard 3D model, overlay thermal imagery to check for temperature anomalies, or switch to a LiDAR view for precise measurements. Built-in tools make it easy to annotate and measure defects directly within the hosted environment.
Secure, role-based access ensures that only authorized personnel can view sensitive data. Different permission levels can be assigned to inspectors, engineers, maintenance teams, or external contractors - essential when sharing data with third parties or regulatory bodies.
Cross-device accessibility allows team members to review models on tablets in the field, workstations in the office, or laptops remotely without compatibility issues. Integration with AI tools, task management systems, and visualization platforms like Matterport creates a cohesive ecosystem that streamlines the inspection workflow.
Organizations using platforms like this report significant time and cost savings. Inspections are completed 75% faster, with 30% more defects detected compared to traditional methods. This efficiency can save hundreds of thousands of dollars on large industrial sites. Many companies see a return on investment within just two months, thanks to fewer site visits, reduced scaffolding expenses, and proactive issue resolution.
"My overall experience with the software has been satisfying because of the efficient workflow. I would highly recommend other organizations to use your software simply because of how much value you get for what you pay for... The ROI is clearly marked within the first few uses." – Angel Rojas, Red Angel Drones
"I had a meeting yesterday with my clients and they really liked the panoramas. I appreciate all the cool tech you've got here." – Connor Barnes, Leading Edge Environmental and Emergency Services
Real-time cloud synchronization makes remote diagnostics possible. Experts can assess assets from anywhere, speeding up decision-making. For organizations managing multiple sites or widely dispersed assets, this transforms inspection data into a continuously updated resource for proactive asset management.
Conclusion
Using drones for 3D modeling has completely changed how asset inspections are done, replacing expensive, time-intensive methods with an efficient digital process. It all begins with careful planning - evaluating the site with digital tools, crafting detailed flight plans, and choosing the right equipment for the job. Once the drone captures high-quality data through precise flights, that imagery is transformed into accurate 3D models, forming the backbone of the entire inspection process.
The real game-changer? These models can reveal hidden issues and predict maintenance needs. By zooming in to sub-millimeter levels, cracks and corrosion that might have been missed come into focus. On top of that, AI-powered analysis achieves incredible accuracy, identifying defects with more than 95% precision. As damage is tracked over time through model comparisons, predictive maintenance becomes possible, catching problems early and avoiding expensive failures. This approach is 75% faster and uncovers 30% more defects than traditional methods, saving organizations hundreds of thousands of dollars on large-scale industrial sites.
Collaboration is key to maximizing these benefits, and it starts with a robust platform for hosting and sharing 3D models. When inspection data, thermal imagery, LiDAR scans, and annotations are centralized in one system, teams can collaborate effortlessly - whether they’re in the office, on-site, or working remotely. Features like cross-device access, role-based permissions, and seamless integration with existing systems create an environment where insights are transformed into actionable maintenance strategies. These tools build the foundation for successful asset management.
Key Takeaways
Success in drone-based inspections hinges on thoughtful planning, high-quality data, and the right technological platform. For example, maintaining a ground sample distance of 1 centimeter per pixel strikes a balance between capturing enough detail and managing data efficiently. Additionally, creating 3D models directly in the field ensures full coverage, reducing the need for costly repeat flights.
Platforms like Anvil Labs simplify the entire workflow, from uploading data to fostering team collaboration. Supporting a wide range of data formats - 3D models, 360° photos, thermal imagery, LiDAR, and orthomosaics - it eliminates juggling multiple tools. Built-in features like annotations, measurements, and secure sharing turn raw drone data into actionable insights. These comprehensive systems deliver measurable ROI in just two months by cutting down on site visits and operational costs.
The ultimate value of this technology lies in shifting from reactive to predictive maintenance. By continuously monitoring asset conditions, organizations can schedule timely repairs, reducing downtime and extending asset lifespan. This proactive approach not only ensures safety and efficiency but also lowers overall maintenance costs, fulfilling the promise of safer, faster, and more cost-effective asset management.
FAQs
How do drones improve safety and efficiency during asset inspections?
Drones have transformed the way asset inspections are conducted by significantly reducing the risks tied to manual inspections. Tasks that once required workers to operate in dangerous conditions, like scaling heights or navigating hazardous areas, can now be handled remotely. This shift not only enhances safety but also limits the need for on-site visits.
On top of that, drones streamline the entire inspection process. They can quickly capture high-resolution images, thermal readings, and even generate 3D models - all in a fraction of the time it would take using traditional methods. The result? Lower costs and more precise, actionable data to support maintenance planning and smarter decision-making.
What should you consider when planning a drone inspection to create precise 3D models?
To create precise 3D models during a drone inspection, several important elements must be carefully managed. Flight planning is a top priority - this involves selecting optimal flight paths, appropriate altitudes, and ensuring sufficient overlap between images to gather thorough and reliable data.
Environmental factors like weather, lighting, and wind conditions can greatly influence the quality of the collected data. For the best results, inspections should be conducted under favorable conditions when these variables are less likely to interfere.
The choice of drone and sensors is another critical consideration. Depending on the asset being inspected, you might need high-resolution cameras, LiDAR systems, or thermal sensors to capture the necessary details. Lastly, having the right data processing tools is essential for transforming raw images into accurate 3D models. Platforms such as Anvil Labs simplify this process by providing solutions for data processing, annotation, and secure sharing, ensuring the final models are easy to analyze and manage.
How do drones and 3D models enhance predictive maintenance and asset management?
Drones have become essential for gathering precise, high-quality data to create 3D models of industrial assets. These models offer a highly detailed and accurate visual of assets, making it easier to spot potential issues and plan maintenance ahead of time. When paired with AI-driven analysis and digital twins, teams can anticipate equipment failures, fine-tune maintenance schedules, and minimize downtime.
Platforms like Anvil Labs streamline the processing and management of drone-captured data. They come equipped with features like spatial analysis, annotation tools, and secure data sharing, which make team collaboration more efficient. By combining drones, 3D modeling, and advanced analytics, businesses can enhance asset management and make smarter decisions to ensure long-term operational efficiency.
